三年前买的腾讯云服务器快到期了,现在的入门服务器要么配置低(内存小、带宽低)、要么优惠短(比如优惠一年,续费就得天价),因此考虑使用自己电脑当服务器。由于大部分家用宽带没有公网 ipv4,导致两个问题:
- ipv4 网络下,无法访问内网服务。
- 常用端口 (80, 443) 被屏蔽了,要访问的话,必须带上端口号,例如:example.com:9870
Cloudflare Tunnel 很好地解决了这两个问题,有了它我们甚至不需要公网 ipv4 或 ipv6,可以把它理解为免费的打洞工具 frp。唯一的缺点是速度可能不够理想,可以把 Cloudflare 作为备用,在无法使用 ipv6 的情况下,也至少能低速访问自己的服务。
安装
前置条件
- 一台已连接互联网的 linux 服务器(不需要公网 ip)
- Cloudflare 账户,虽然 Cloudflare tunnel 套餐是免费的,但可能需要绑卡
- 一些基础的 linux 知识
准备
首先需要有一个域名,并把它的 DNS 迁到 Cloudflare(域名服务商后台点几下就好了),这里没有教程,不赘述。随后进入 Cloudflare Zero Trust 控制面板,初次使用需要选择 Plan,选择 Free Plan,白嫖就完事了。
服务器安装 cloudflared
在 linux 服务器上安装 cloudflared,我的系统是 manjaro,直接 yay -S cloudflared 就行了,安装成功后,在命令行执行 cloudflared 应该就有输出。
配置与转发
在服务器上配置 tunnel,有两种配置方式,一种是通过 Cloudflare 控制台,另一种是通过命令行。我使用的是命令行,写脚本比较方便,有如下几步(以下示例使用 zzz 作为服务器的用户名,example.com 作为域名):
- 创建 tunnel
Bash# 登录cloudflare
cloudflared tunnel login
# 创建一个tunnel,名字自定,这里用my-tunnel
cloudflared tunnel create my-tunnel
然后,执行
cloudflared tunnel list显示 my-tunnel 的 ID:Bash~ $ cloudflared tunnel list ID NAME CREATED CONNECTIONS xxxxxxxx-xxxx-xxxx-xxxx-xxxxxxxxxxxx my-tunnel 2023-01-08T02:26:41Z 2xLAX, 2xSJC - 编写配置文件,
vim ~/.cloudflared/config.ymlYAMLtunnel: xxxxxxxx-xxxx-xxxx-xxxx-xxxxxxxxxxxx credentials-file: /home/zzz/.cloudflared/xxxxxxxx-xxxx-xxxx-xxxx-xxxxxxxxxxxx.json ingress: # ssh - hostname: ssh.example.com service: ssh://localhost # vnc远程桌面,端口5900 - hostname: vnc.example.com service: tcp://localhost:5900 # 其他http服务 - hostname: file.example.com service: http://localhost:9527 - hostname: speed-test.example.com service: http://localhost:9898 # 如果都没有匹配,则返回404,这句不能少 - service: http_status:404 - 写一个脚本,自动更新 DNS 以及运行 tunnel,
vim ~/tunnel-sh.shBash# update cloudflare DNS record /usr/bin/cloudflared tunnel route dns my-tunnel ssh.example.com /usr/bin/cloudflared tunnel route dns my-tunnel vnc.example.com /usr/bin/cloudflared tunnel route dns my-tunnel file.example.com /usr/bin/cloudflared tunnel route dns my-tunnel speed-test.example.com # run tunnel /usr/bin/cloudflared tunnel run my-tunnel - 开机自启
新建一个 service,
sudo vim /etc/systemd/system/cloudflared-tunnel.serviceTOML, also INI[Unit] Description=cloudflared tunnel Wants=network-online.target After=network-online.target StartLimitInterval=300 [Service] User=zzz ExecStart=sh /home/zzz/tunnel-sh.sh # 如果启动失败,自动重试,因为开机自启大概率报错网络问题 Restart=always RestartSec=30 [Install] WantedBy=default.target启动 & 开机自启
Bashsudo systemctl start cloudflared-tunnel.service
sudo systemctl enable cloudflared-tunnel.service
访问服务
以上完成后,http 服务便可以正常使用,访问 http://file.example.com/wtf 相当于访问服务器的 http://localhost:9527/wtf。服务端到此已配置完毕。
ssh 访问
需要在客户端也安装 cloudflared,安装方式和上面一样,我的客户端是 Windows,下载 cloudflared-windows-amd64.exe 文件,然后添加一个 ssh 配置:
.propertiesHost ssh.example.com
  # 把 D:\tools\cloudflared-windows-amd64.exe 改成你自己的目录
  ProxyCommand D:\tools\cloudflared-windows-amd64.exe access ssh --hostname %h
使用 ssh zzz@ssh.example.com 即可 ssh 登录。
vnc 远程桌面
客户端使用 vnc 远程桌面访问服务器 (假设服务器已经开启了 vnc server),需要先在客户端的命令行里执行 cloudflared access tcp --hostname vnc.example.com --url tcp://localhost:5901,这个命令把 vnc.example.com (对应服务器的 tcp://localhost:5900) 映射到客户端本地的 tcp://localhost:5901。 然后我们用 vnc viewer,或者其他 vnc 软件,使用 localhost:5901 登录 VNC。
浏览器访问 SSH&VNC
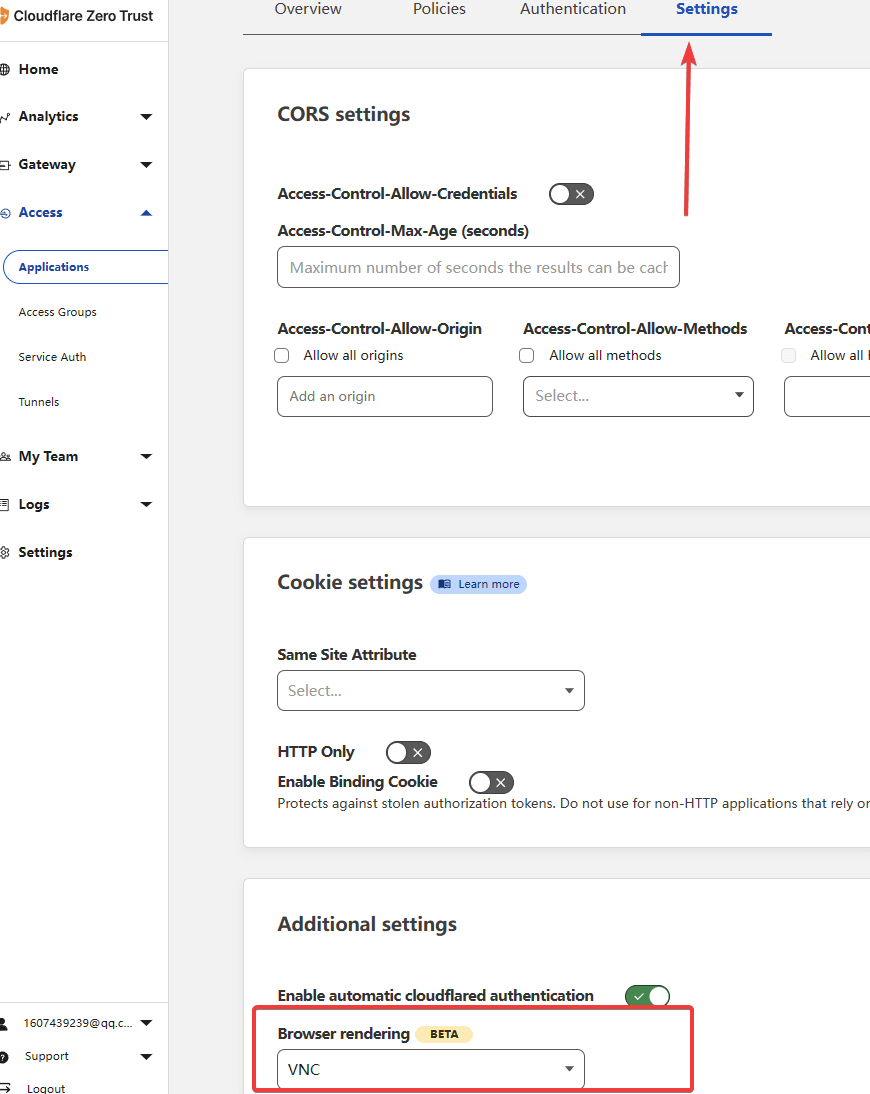
浏览器本身不支持 ssh 和 vnc,Cloudflare 的 application 提供了 ssh 和 vnc 浏览器渲染功能。首先,创建一个 application,域名输入 vnc.example.com,在 Settings 界面选择 Browser rendering 为 VNC:  选择 VNC 保存后,访问
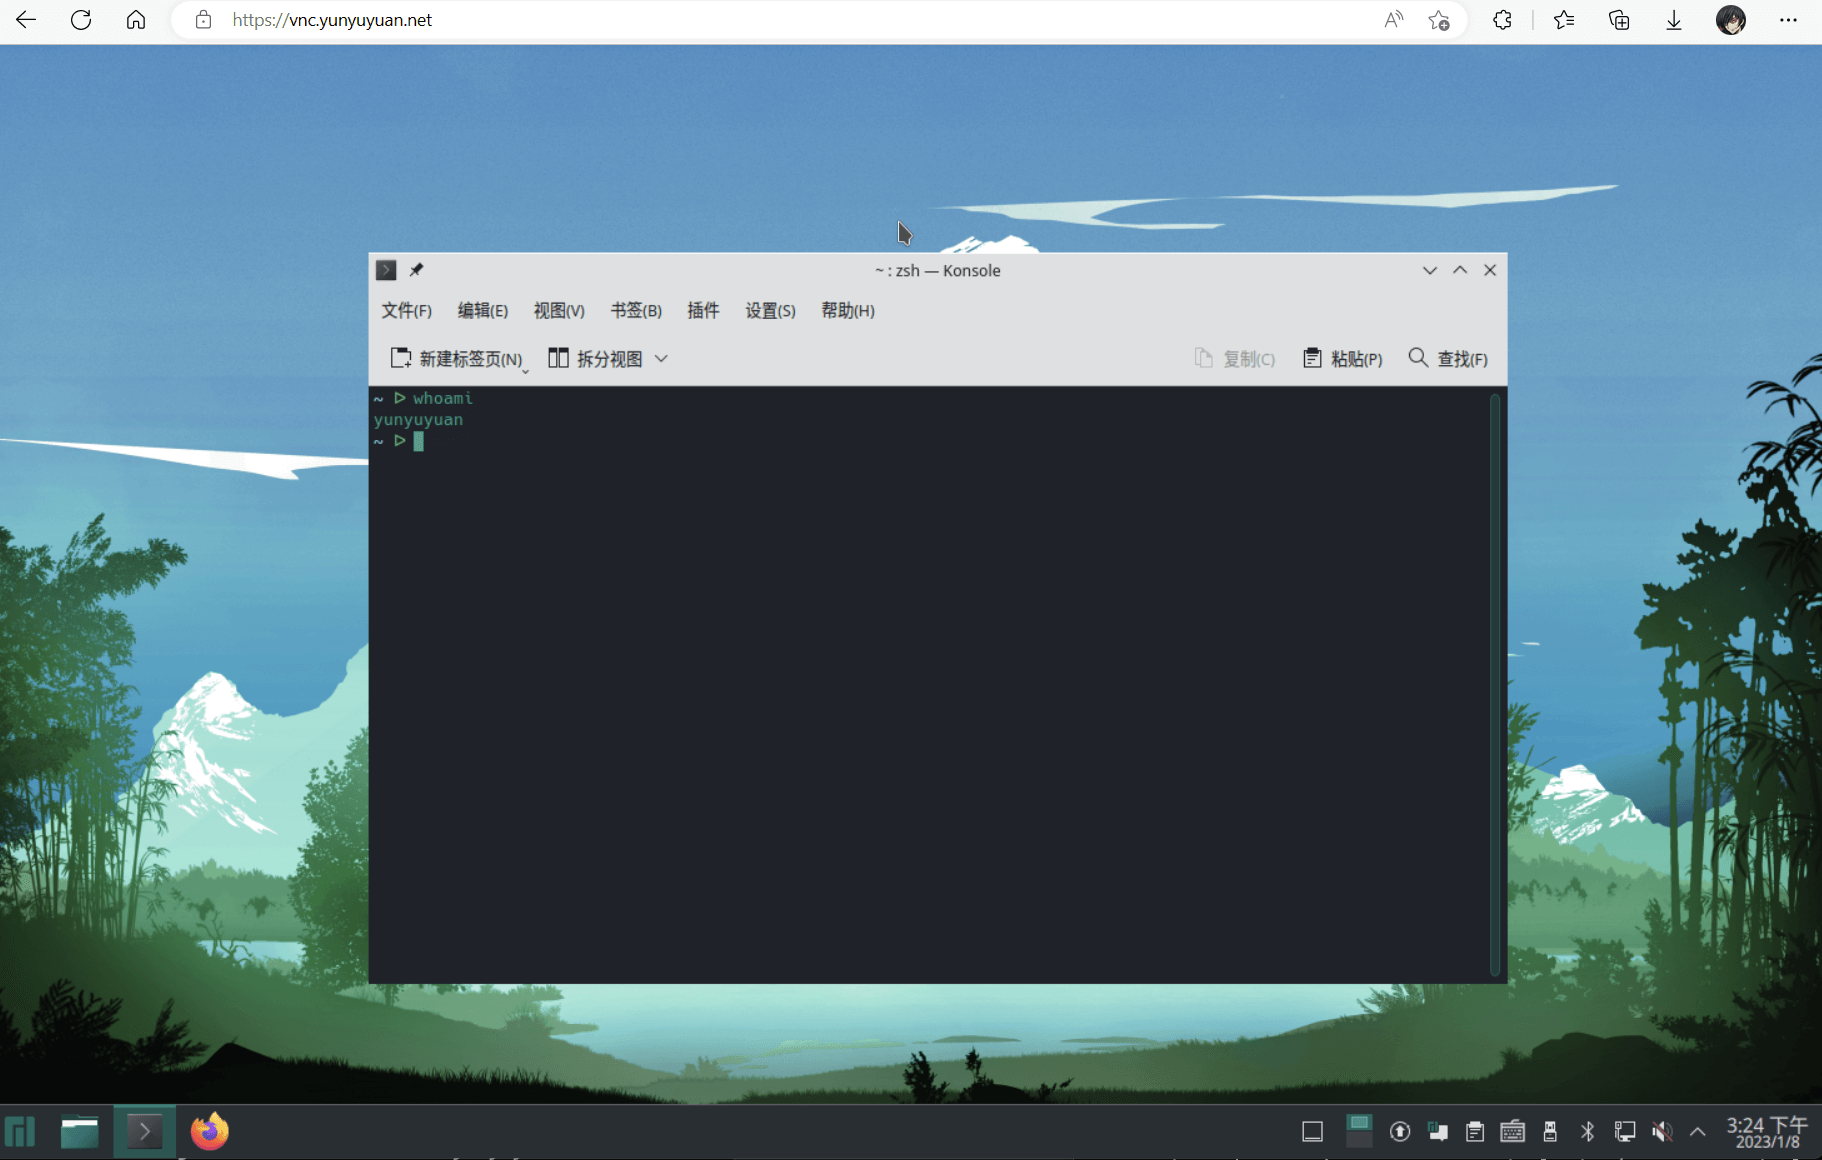
 http://vnc.example.com,输入密码登陆 VNC:  浏览器上的 VNC SSH 同理,域名输入
 ssh.example.com,Browser rendering 选择 SSH,保存后访问 http://ssh.example.com 可以看到一个终端界面。